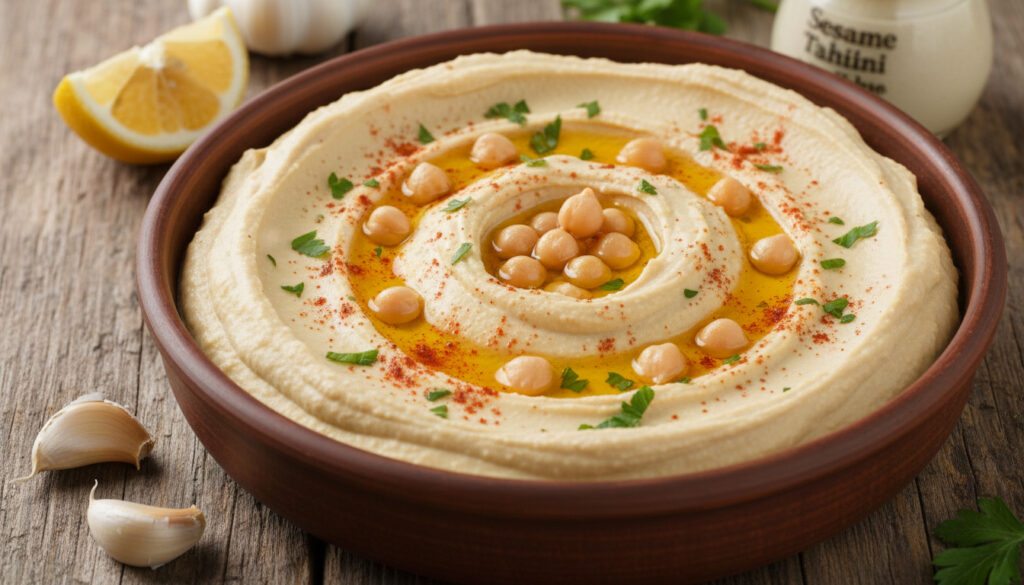
How to Make Hummus – Creamy Homemade Recipe
Homemade hummus delivers freshness that supermarket tubs cannot match. With a blender or food processor and a handful of pantry staples, you can produce a creamy dip in approximately five to ten minutes, controlling every element from salt content to texture without preservatives or fillers.
While traditional Lebanese preparations rely heavily on tahini for nutty depth, modern variations omit the sesame paste entirely, substituting sunflower seeds, sour cream, or simply extra aquafaba to achieve similar richness. A Gouda Life notes that these tahini-free versions often surpass store-bought alternatives in both texture and flavor.
What Ingredients Do You Need to Make Hummus?
| Time: 5-10 minutes | Servings: 2-4 | Difficulty: Easy | Calories: ~120-150 per serving |
- Canned chickpeas provide consistent results without overnight soaking
- Aquafaba, the reserved can liquid, creates fluffier texture than water alone
- Fresh lemon juice delivers brightness that bottled versions lack
- Garlic intensity varies by preparation method, ranging from sharp raw cloves to mellow roasted variants
- Quality olive oil affects both flavor profile and emulsion stability
- Ground cumin adds earthy depth without overwhelming the chickpea base
- Tahini-free formulations utilize sunflower seeds or sour cream for comparable richness
| Ingredient | Amount | Purpose |
|---|---|---|
| Canned chickpeas | 15 oz (1 can) | Base protein and body |
| Lemon juice | 1-3 Tbsp | Acidity and brightness |
| Garlic | 1-2 cloves | Aromatic foundation |
| Salt | ½-1 tsp | Flavor enhancement |
| Olive oil | 1-2 Tbsp | Creaminess and richness |
| Water or aquafaba | 2-4 Tbsp | Consistency adjustment |
| Cumin (optional) | ½-¾ tsp | Warm, earthy undertones |
| Paprika (optional) | Pinch | Color and mild heat |
How to Make Hummus Step by Step
Preparation Phase
Drain and rinse one 15-ounce can of chickpeas. Reserve two to four tablespoons of the viscous liquid, known as aquafaba, before discarding the remaining brine. For ultra-smooth results, remove the chickpea skins by rubbing the drained legumes gently between your hands or against a clean kitchen towel; the skins detach readily with minimal pressure.
Blending Process
Transfer the chickpeas, lemon juice, garlic, salt, optional spices, and two tablespoons of reserved liquid into a blender or food processor. Pulse initially to chop the ingredients, then process on high speed for one to two minutes until the mixture achieves a creamy consistency. Scrape down the sides periodically to ensure even blending. If the mixture remains too thick, add additional liquid one tablespoon at a time until the texture becomes fluffy rather than runny. Farm to Table to Soul recommends drizzling in the olive oil during the final moments of blending to achieve optimal silkiness.
The starch-rich liquid from canned chickpeas creates superior emulsification compared to plain water, yielding a lighter, more aerated texture without additional fat.
Taste the finished blend and adjust seasoning with additional lemon juice or salt as needed. Transfer to a serving vessel and garnish with a drizzle of olive oil and a sprinkle of paprika.
Tips for the Creamiest Homemade Hummus
Equipment Selection
High-powered blenders, such as Vitamix models, generate the fluffiest consistency by creating a powerful vortex that fully incorporates air into the emulsion. Food processors function effectively but require more frequent scraping of the bowl sides and extended blending times at full power to achieve comparable smoothness.
Texture Enhancements
Peeling chickpea skins eliminates fibrous particles that prevent perfectly silky textures. Using cold water or chilled aquafaba helps maintain the emulsion during the heat-generating blending process. For tahini-free versions that retain nutty richness, video demonstrations indicate that half a cup of roasted sunflower seeds or sunflower seed butter substitutes effectively, while Veggies Save the Day suggests toasted sesame seeds as an alternative approach.
How Long Does Homemade Hummus Last and Storage Tips
Transfer finished hummus to an airtight container and refrigerate immediately. Properly stored batches maintain optimal quality for four to five days. For extended preservation, freeze portions in sealed containers for up to three months; thaw overnight in the refrigerator and stir thoroughly to reincorporate any separated liquids before serving.
Batches containing high proportions of aquafaba should not remain at room temperature for extended periods. Chef Denise notes that increased moisture content accelerates spoilage compared to thicker preparations.
Preparing hummus at least one hour before serving allows the flavors to meld and intensify during refrigeration, creating a more cohesive taste profile that improves upon initial blending.
Is Homemade Hummus Healthy? Nutrition Facts
Homemade hummus typically contains 100 to 150 calories per quarter-cup serving, with basic tahini-free versions falling closer to 120 calories. Each serving provides approximately five to eight grams of plant-based protein and four to six grams of dietary fiber, making it a nutrient-dense option for those monitoring How Much Protein Should I Eat.
Unlike commercial varieties, homemade preparations contain no preservatives or artificial fillers. You control sodium and oil quantities, allowing customization for specific dietary requirements. The combination delivers iron and folate from chickpeas plus vitamin C from fresh lemon juice. Using quality olive oil contributes heart-healthy monounsaturated fats. The dip remains naturally vegan and gluten-free.
What Is the Preparation Sequence From Start to Finish?
- Drain and reserve: Open one 15-ounce can of chickpeas, draining while reserving 2-4 tablespoons of aquafaba liquid.
- Optional peeling:Remove chickpea skins by rubbing between hands or a towel for extra smoothness.
- Initial combine: Add chickpeas, lemon juice, garlic, salt, spices, and aquafaba to blender or processor.
- Blend: Process 1-2 minutes on high until creamy, scraping sides and adding liquid as needed to reach desired consistency.
- Emulsify: Drizzle in olive oil during final blending seconds for silkiness.
- Season: Taste and adjust lemon or salt levels to balance the flavor profile.
- Rest: Refrigerate at least one hour before serving for optimal flavor integration.
Established Facts and Regional Variations
| Well-Established | Debated or Regional |
|---|---|
| Canned chickpeas produce equally reliable results compared to dried-and-cooked versions | Authentic Lebanese tradition requires tahini; omission creates debate over proper nomenclature |
| Aquafaba serves as an effective emulsifier and thinning agent | Exact garlic-to-lemon ratios vary significantly by family tradition rather than fixed rules |
| Refrigeration extends freshness safely for 4-5 days | Serving temperature preferences differ between cultures, with some preferring room temperature |
| Basic recipes require no cooking heat after chickpea preparation | Texture expectations range from completely smooth to intentionally rustic |
The Cultural Context of Hummus
This Levantine spread has migrated from Middle Eastern kitchens to global tables, functioning as both dip and sandwich component. While purists argue that true hummus must contain tahini, contemporary adaptations accommodate allergies and ingredient availability by using simple substitutions that maintain the essential chickpea-forward character of the dish.
Recipe Authorities and Expert Perspectives
These tahini-free versions are praised as “proper hummus” or “better than store-bought.” Purists note chickpeas are the star.
A Gouda Life
Homemade preparation eliminates preservatives while offering superior taste and texture control compared to commercial alternatives.
The Wholesome Dish
Mastering Your Homemade Batch
Creating hummus at home requires minimal equipment and delivers maximum flavor customization. Whether you follow traditional methods with tahini or explore Cream Tea Near Me for complementary serving occasions, the process remains straightforward and forgiving. The absence of preservatives means you consume only the ingredients you personally select, resulting in a cleaner, fresher spread tailored to specific nutritional needs.
Frequently Asked Questions
Can I prepare hummus without a blender or food processor?
Yes. Mash cooked chickpeas thoroughly with a fork or potato masher, then whisk in remaining ingredients. The texture will remain rustic and chunky rather than perfectly smooth.
Is this recipe suitable for vegans?
Absolutely. Traditional hummus and most tahini-free variations contain no animal products, provided you avoid dairy-based substitutions like sour cream.
Why does my hummus taste bitter?
Excessive raw garlic or old, rancid tahini typically causes bitterness. Reduce garlic quantity or roast cloves first, and always taste your tahini before adding.
Can I use dried chickpeas instead of canned?
Yes, but you must soak and cook them until very tender first. Reserve some cooking liquid to use in place of aquafaba.
How can I fix hummus that is too thin?
Add more chickpeas or sunflower seeds to absorb excess liquid, or blend in a tablespoon of additional tahini or seed butter.
Is it necessary to remove chickpea skins?
No, but peeling creates noticeably smoother texture. For quick preparation, the skins can remain without affecting flavor.
Can I substitute lime juice for lemon?
While possible, lemon juice provides the traditional acidity profile. Lime creates a different flavor that some find less characteristic of classic hummus.
More related posts
 Marie Curie: Scientist and End-of-Life Charity Explained
 Ken Barlow: Age, Health, and Marriages on Coronation Street
 FA Cup Final 2024: Manchester United’s 2-1 Win vs Man City
 What Does 6 7 Mean Slang – Chicago Origins and Meme Evolution
 Toy Storage Ideas: Smart and Stylish Solutions for Every Room
 How Much is a Specsavers Eye Test in Ireland? Up to €30
 Adrian Higham Net Worth: Updates on Career, Health & Exit
 Richard Coles: Why He Left Being a Vicar & New Partner
